Showing posts with label Motorcycle Tips. Show all posts

How To Enlarge Two-Stroke Ports ?

In this article I am going to assume that some of you who read them got enthusiastic with your new-found knowledge and carried out some tuning work on your classic two-stroke. Maybe your next step was to buy some race exhausts and larger carbs. If the port windows have been modified/tuned but the diameters/areas of the inlet ports and exhaust ports have remained the same, then with the race pipes and bigger carbs it will be like trying to get a quart into a pint pot, or the metric equivalent. I am going to cover enlarging the inlet and exhaust ports.


How To Enlarge Two-Stroke Ports ?


With a tuned engine, you will have a higher and wider exhaust port window (the window is the actual port in the liner in the cylinder bore), combined with maybe a standard exhaust port (from the window to the exhaust pipe flange). If this is the case the gases are not going to be able to get away as quickly as they want to, there will be a bottle-neck in the port. The engines and ports I am describing here are in classic road-bikes, not race engines.

First of all measure the internal diameter of the flanges of the race exhausts you have bought/fitted. Most times the exhaust maker will have made the exhausts with a larger flange internal diameter than the standard exhausts with the idea of the port diameter being enlarged. Usually they will have made the flange the same diameter as the exhaust gasket if the gasket is larger than the port (which it usually is).

How To Enlarge Two-Stroke Ports ?

If this is the case with your exhausts and gaskets, you can use the gasket as a template for the next part of the job. If the exhaust flange is a different diameter to the gasket you will have to make a ring of the correct diameter as a template. Mark inside the exhaust port where the gasket sits with a felt-tip pen, then fit the gasket or ring and run a scriber around to mark out where you are going to enlarge the port to. Although I scribe mark it, I leave the gasket in position and use it to grind to.


How To Enlarge Two-Stroke Ports ?


I use my porting tools to remove the metal but if you buy a long series carbide burr from a motor factor you can use it in a hand-drill. Grind the metal from the exhaust port to match the gasket or ring all the way around. When finished you will have a large port window and a large port outlet but a narrow port all the way through, which obviously will have to be enlarged. Do not try to remove too much metal too quickly. Use a pair of callipers or something to measure and keep checking the internal diameter. Basically what you will be doing is removing metal from the port carefully from window to outlet so that there is a straight passage with no necking from the window all the way through. When you are satisfied with the work you have done with the cutter/burr, make a split mandrel to wrap some emery cloth around and finish off the port smoothly.

To make a mandrel, get a piece of metal rod approximately 6mm in diameter and saw a slot in the end about 30mm long and round off the end. You can use progressively finer grades of emery cloth to improve the finish.

How To Enlarge Two-Stroke Ports ?


With an inlet port on a piston ported engine, that is one without reed-valves, the work is similar to that on the exhaust port. If you have fitted or are fitting larger carbs, measure the internal diameter of the carb and enlarge the carb rubber to the same size. Use the carb rubber as a template to mark out the diameter with a felt-tip and scriber that the port has to be enlarged to, if it is only a small amount just match the rubber to the port. As with the exhaust port grind the inlet port to the scribed line and use the straight edge and callipers to make the port as straight as possible with no necking in size. Finish off with the mandrel and emery cloth.


With the inlet ports of the Yamaha reed valve range things are a little more difficult. Once again I am assuming the port window has already been enlarged. To make the inlet port larger entails machining the barrel to take a larger reed block, usually a block from another Yamaha in the range. For example some of the small 50cc and 80cc machines can use the reed block from the RD125DX or an early 50cc or 80cc moto-crosser. The RD125DX can use the blocks from an RD250. The RD400 and 250/350LC can use the blocks from the 350YPVS. The example I am showing is fitting a V Force Banshee reed block to an RD500LC. I really rate the V Force reed blocks, they can be bought from Hard-core Racing.


How To Enlarge Two-Stroke Ports ?


Yamaha reed blocks are tapered from side to side so that when you measure the width, measure it at the widest point. Mark out the new width that you want with the felt-tip and scriber. Carefully grind the inlet to the marked out diameter. You will find as you try to fit the reed block into the barrel that you need to keep enlarging the port a bit at a time as the block is entering the port, it's a time consuming job and you need to be careful. If you do grind through the side of the port it's not the end of the world you can always have it welded, as I have found on this job! The V Force Banshee block will not quite go in the RD500 without a little welding: it is almost dead size and leaves the port too thin.

When you have ground out the port so that the larger block fits the next step is to make sure that the reed petals open without catching in the port, this something that most people forget to check. How does that sound?

How To : Prep Your Bike for Winter ?

Births, deaths, taxes and rust are life’s certainties. You can’t do much about the first three, but you can stop your bike dissolving this winter...


At Risk Areas


Downpipes are prone to corrosion if not treated. If yours have already rusted, wash them and use fine wire wool to clean off as much rust as possible. Once the exhausts are cool, apply a thin coating of anti-corrosion spray to the headers and work it in with a cloth all the way to the silencer. Corrosion to the front of crankcases, shocks, suspension linkage and wheels is also common as these areas pick up salt, diesel and dirt from the road.

After a good clean and degrease, spray a thin layer of anti-corrosion spray over these areas. Use a cloth to apply ACF-50 to wheel rims and use this cloth to coat bolt heads everywhere on the bike including brake disc bolts, which commonly corrode.


Preparation


Make sure you clean and dry your bike thoroughly before applying any waxes or sprays. Firstly, rinse down the bike to remove any grit or dust that may have settled. A high pressure airline if available makes quick work of removing water from any tough nooks and crannies to reduce future corrosion on bolts.

Next spray the bike with either a good degreasing agent, or degreaser and motorcycle wash two-in-one. We prefer S DOC 100 Total Motorcycle Cleaner. This is a non-acid product that’s chemically designed to lift dirt and grime. Some acid-based cleaners can tarnish aluminium or damage lacquer or anodised parts if left to dry. Leave the bike to dry before proceeding.


Waxes or Sprays ?


It’s a complicated world of different products out there. Waxes and sprays leave a thin film over your bike’s components and paintwork, protecting them from the elements. Use waxes to perfect your paintwork and anti-corrosion sprays on rust-prone areas.

Whether you choose a spray or wax use a lintfree cloth to polish in the product. Work wax into all parts with a circular motion, including metal, chrome, fairing and even exhausts. Waxes will leave all surfaces with a highgloss shine and also protect from scuffs and allow rain and moisture to run off. Matt waxes are now available for matt paint and foil coatings. You can even use them on matt helmets to restore the original finish.

Give the Thieves A Challenge At Least...!

Facebook biking groups are regularly filled with expletive-laden posts regarding stolen bikes, often supported by CCTV coverage of the theft in progress.

The common thread of the incriminating footage seems to be the ease with which the bikes are removed, ranging from almost wheeling them away to cutting the most meagre of security chains in a few seconds – look at this one as an example: bit.ly/bikegone


In truth, if anyone is committed to stealing your bike you are going to struggle to stop them, but watch and learn from YouTube and you can at least make them have to work for it. A cover makes the bike more difficult to identify as a target.

Even a good quality chain, lock and ground anchor will, at best, slow them down, but combined with a highly visible disc lock, will make wheeling the bike away much more difficult. An alarm will be a deterrent but can be dismissed as yet another false alert on its own, but a tracker will put you in touch immediately the charmers have disturbed the bike, and keep you posted once they’ve made off without them even being aware.

A combination of all of the above and, short of a truck with crane, your bike may remain in your possession. Just please stop moaning when you haven’t done your best first.

How To Buy Motorcycle Ear Plugs ?

Don’t wash them and they’ll become a sticky, gooey, waxy mess. Don’t wear them and you’ll be cleaning your hearing aid in the retirement home. Ear plugs...


How To Buy Motorcycle Ear Plugs


Noise Reduction


Different ear plugs will be tested to different dB(A) ratings. dB(A) is the smart way of writing decibels. A higher number means a louder sound and as a rule, the noise level doubles every three decibels. Without hearing protection at 100dB(A) your riding time is limited to two hours of daily exposure before this noise level becomes damaging to your long term hearing. At 115dB(A) your allowed exposure is cut down to fifteen minutes.

When buying ear plugs always read the packaging to know exactly what noise reduction you are getting for your money. If you are one of those riders who likes to remove the baffle or battle against the wind on an unfaired bike, a higher dB(A) rating might be a good idea.


What's Your Riding Style ?


We experience different noise levels depending on the type of riding we’re doing. The faster the ride, the more you need to care about protecting your hearing by buying the best ear plugs. To put it into perspective, when travelling at 65mph you will be exposed to around 100 dB(A). If you’re out on your bike for six hours plus per day – without hearing protection – you can imagine the damage. Even riding around town at 30mph can expose you to 90dB(A). Track riders at 100mph are experiencing approximately 110dB(A) inside their helmets, and Kawasaki H2R or MotoGP riders might as well be sitting on the speaker stack at a Motörhead gig.


Commit to Cleaning


It’s never a pleasant sight when you pull out an ear plug and you have half a candle stick on the end of it. One little trick that never goes a miss is to clean your ears more regularly – simple yet highly effective. But most importantly, don’t put dirty ear plugs back in your ears. This can introduce infectious bacteria.

I find moulded and silicone ear plugs tend to be a lot easier to clean and take less ear wax with them when you pull them out compared with cheaper foam products. Flanged ear plugs with the triple cup design act a bit like a cork screw when you pull them out so wax does sometimes get trapped between the layers. The good old fashioned way has always worked best for me: a bowl of warm soapy water. If you’re wondering, Fairy Liquid is what I use. Keep them clean and you’ll be less inclined to show them the confines of your kitchen bin.


Try Them On !


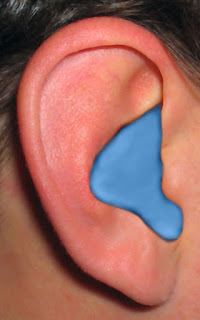
Before committing to pricier ear defenders get your hands on a few sample pairs and wear them for extended periods of time. When trying out your plugs it is vital you move your jaw around by chewing, yawning and talking. Your moving jaw can alter the shape and dimensions of your ear canal, potentially turning comfortable earplugs into painful ones. And if your earplugs are uncomfortable the odds are you’ll be disinclined to wear them. If you also spend time listening to music or radio via headphones seriously consider a pair of combination earplugs and earphones.


Best Ear Plugs


How To Buy Motorcycle Ear Plugs


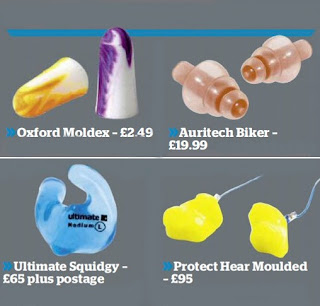
Oxford Moldex - Price £2.49


These light ear plugs are made from Moldex foam. You’ll get two pairs to a pack, probably in crazy colour schemes whether you like them or not. A tapered shape allows them to slide into your ear canal and the foam seals out an impressive 35dB(A) of noise. Cheap enough to dispose of, or wash and reuse.


Auritech Biker – Price £19.99


These Auritechs cut out a good level of road and bike noise but are attenuated to allow conversation and intercom communication. It’s all done through a patented ceramic filter that sits deep in your ear, surrounded by levels of malleable plastic.


Ultimate Squidgy – Price £65 (Plus postage)


Yes they are at the top end of any ear plug budget, and you have to pay £20 extra (and go to Orpington) to get your ear impressions done. Small and lightweight, the Squidgy reduces noise by 30dB(A). A one year guarantee is included, and they will last a very long time.


Protect Hear Moulded – Price £95


I bought a pair of these custom moulded plugs to protect my ears on the racetrack. I find their medical grade silicone design dealt well with the far higher levels of noise that come with a track-focused machine. With regular use, expect a lifespan of five years.

How to Buy : Technical Base Layers

These aren’t just for the depths of winter. Feel cold and clammy after a hot day’s ride ? Maybe you should be wearing one too...


Technical Base Layers


Under-Armour


Base or mid-layers with body armour are becoming more popular, and are arguably safer than more traditional armours found in jacket pockets. No matter how well-fitting a jacket is, any armour attached within may move about in a crash. The best way to make sure armour stays in the right area is to attach it as closely as possible to your body and having the armour in a base or mid-layer means it’s much more likely to stay in place and do its job of protecting you (Forcefield Pro Shirt body armour pictured).

Racers tend to go for base layer armour, which should tell you all you need to know. It may be more of a performance to put on – but that’s a tiny price to pay for peace of mind. Layers with chest protection are becoming more readily available now and many protectors are nice and supple. Much like contact lenses – after a short period of acclimatisation you probably won’t even know you’re wearing them.


Moisture Wicking


Wicking properties are definitely worth taking into consideration when buying base layers. The wicking process moves sweat away from the skin, making the wearer feel warmer and more comfortable. The best fibres for wicking away moisture are wool and synthetic such as polyester. Merino wool is a good choice due to its softer, less itchy feel and anti-bacterial agents that reduce odours. It doesn’t matter what brand you go for: all Merino wool has natural antibacterial properties. Cotton does wick moisture to a point, but it’s slow to dry and so should be avoided for cold weather riding.


Riding in Cold Weather


Use a base layer with thermal properties. Synthetics such as polyester micro fibres, and Merino wool are the kings. Merino wool also helps to regulate body temperature. Tiny air pockets in the wool help retain heat within the fibres to keep you warm while also drawing away excess heat from the body. This technique of keeping your body temperature just right is called temperature regulation. Merino wool comes in different weights, and 200gsm Merino is a good standard for motorcycling base layers here in the UK. The quality brands state the weight, others don’t.


Block Out The Wind


Windblocking layers work best when twinned with base layers. The wind chill factor on a motorcycle lowers your body temperature even in summer, so without windblocking a base layer’s ability to regulate heat is badly affected. Our bestselling type of windblocking products are turtleneck tops. These stop the wind from racing down your neck and freezing your base layers.


Battery-Powered Warmth


All year round riding may require some battery power to keep you warm. There are some base layer gloves and socks on the market to keep exposed hands and feet toasty in low temperatures. These items use either their own battery power pack that you recharge at home, or run directly off your motorcycle’s electrical system. No one should be put off hard wiring connectors to a bike’s battery. Its very simple: just connect the eyelet leads to the battery and away you go.

A Complete Guide To Check & Repair Brake Fluid

Do we really pay as much attention to what our brake fluid is doing as we should ?


Many bikers who look after their own steeds change the oil and filter, the spark plugs, check the disc pads and check that the lights work.

Very few seem to have a clue in a bucket how often other fluids need changing, nor the brake lines. Standard stock rubber brake lines should be changed every four years : fact ! Given the huge cost of stock items a sensible person will replace the cheap (to make) OE rubber lines with braided lines with stainless fittings.


They are less costly than OE and many, such as HEL, carry a lifetime warranty. Rubber lines swell under pressure, wasting lever/pedal effort which should be going into stopping the bike. If you lightly grip a rubber brake line, especially an old one, and grab a handful of anchor you will feel the line expand slightly in your fingers. The power to swell that line should be acting on the brake pads!

Another issue that few seem to appreciate is that brake fluid has a fairly short lifespan and should be changed regularly. It is hygroscopic, which means that it absorbs water. On the whole this is a good thing as it stops the water collecting in corners of the braking system, but you don’t want a very high concentration of water as it will attack the braking system components.

Watery fluid often sets up corrosion behind the caliper seals and the flaky aluminium pushes the seal tight against the piston, massively reducing brake efficiency. The water also attacks the chrome of the piston, eventually holing it and setting up rust underneath in the mild steel. For some bikes it is just the hassle and expense of new pistons, for others you really have a much bigger problem if you can’t get a new one.

At its worst the water loaded fluid will boil in the calipers from the heat generated from the pad to disc friction and that is really bad news. Laser Tools produces a cracking little professional tool for the trade which measures the water content of the fluid. We bought one years ago and have found it invaluable. We not only test the fluid in the bikes but also the new fluid.


When we first got the tool and were playing with it, we tested some brand new fluid from an unopened pot only to discover that it had a high-water content! We now buy our fluid from large high street autoshops, because they have a massive turnover and the fluid is always fresh.

It breaks my heart to pay retail, but it is better that than putting dodgy fluid in bikes! Given the ramifications of a brake failure, we now test all fluid before use as a matter of course.

With a MityVac Vacuum Brake Bleeding Kit, changing the fluid is a piece of cake. It’s best to wrap the threads of your bleed nipples with PTFE tape to stop it sucking air past the threads. Do this when you throw away the nasty BZP coated mild steel nipples to fit nice stainless ones!


Fit the vacuum pipe to the nipple, pump up a vacuum and crack open the nipple so the MityVac can suck the fluid out. Ensure that you keep topping up the master cylinder reservoir so that you don’t suck air into the system, or you will have to bleed it out again.

It isn’t hard to bleed most bikes with a MityVac, though in my experience Old Kawasaki fours are a nightmare for hiding little pockets of air for some reason, especially at the splitter. Keep sucking the fluid until you’re sure all the fluid is new.

If you’re really keen, empty out the MityVac pot and draw some more fluid out and test that. When doing front systems, I tend to get She Who Must Be Obeyed to keep the master cylinder reservoir topped up whilst I concentrate on the calipers. I always cover the tank with a new bin bag just in case SWMBO spills a bit of fluid on the paint work – although she seems to have a steady hand !

Always clear up spills ASAP as fresh brake fluid is a very adept paint stripper. I always wear disposable nitrile gloves as I find it hard to believe that something that melts paint is going to beneficial to my skin.


Practicalities and Pressures, Look After Your Tyres !

You should be checking your pressures like you check your wallet and keys before you head out. Make life easier by fitting angled tyre valves, and keep a gauge by the garage door. The owner’s manual, or the internet will provide suitable pressures, but, again, we’re grownups, so if you want to experiment with a few PSI up or down, be our guest.


Of course, trackday use means softer pressures generally, while two-up, luggaged, high-speed Autobahn generally means higher pressures. If you’re unsure, stick to the tyre manufacturer’s, or bike manufacturer’s recommendations.


Changing Tyres


It’s possible to remove, fit, and balance bike tyres yourself, if you invest a moderate sum of cash. A bead breaker, some tyre irons, a tub of tyre lube and a bit of practice will have you slipping the old hoops on and off like George Clooney removing a hennight bra. Static balancing is fine for most purposes, and you can rustle up a balancing setup with an old paddock stand easily enough, or buy a proper one. Once you get started, you’ll never pay a shop £20 to fit rubber ever again. Punctures are the devil's work and in the olden days, you were pretty much screwed, when you rode over a screw.


But there are a few decent puncture repair kits around now. On a tubeless tyre, you can use an external plug repair, which will get you home (within reason). Indeed, some people (not us) have used external plug repairs for hundreds, even thousands of miles. Not recommended, but testament to the repair integrity. Top tip – carry extra gas canisters, or a small pump: the supplied canisters aren’t always enough to fill a fat rear tyre.


- Tubed tyres are more of a faff – you really need the tyre off and the tube out for a patched repair.

- Aerosol-type ‘tyre-weld’ repairs are less good in our experience, and can make a proper repair later
more difficult. They are convenient though, and in an emergency, might do the job.

- No-one who we spoke to recommends the pre-puncture repair fluids which you put in your tyre before you get a puncture. The manufacturers of these products claim they’re safe and effective, but the big tyre firms warn against them. The argument is that they may hide a very serious piece of damage to a tyre – i.e. you won’t notice a puncture straight away, and the tyre can be dangerously damaged. Bridgestone told us, “The use of ANY liquid sealant will render any warranty invalid. This form of temporary repair can have a detrimental effect on ply material and can hide any secondary damage caused by the penetrating object. You have to bear in mind that once the carcass of the tyre is penetrated it is deemed as broken and this is not how it was designed! Therefore, over a period of time the carcass of the tyre could break down with catastrophic consequences.

- The best repair is a properly approved, internal mushroom plug applied by a trained fitter. The hole must be no bigger than 3mm, and must be within the centre area of the tread. Only one repair per tyre, and many manufacturers don’t recommend repairs to V-rated tyres (more than 150mph).

6 Things You Should Check Before Ride a Motorcycle

Motorcycles require more upkeep than cars. This has always been the case, and it is still a fact of motorcycling life, even with the technological advances you learned about in Anatomy of Motorcycles. The consequences of a systems failure on a bike are much more severe than they are if something goes wrong with your car.

Take a blown tire, for example. When a tire blows on your car, you can have difficulty controlling it. When the same thing happens on a bike, the danger level increases exponentially.


The best way to avoid a catastrophic failure is to inspect your motorcycle on a regular basis. Some items need to be checked more often than others : some should be checked each time you go out for a ride. The Motorcycle Safety Foundation (MSF) uses the "T-CLOCK" method to help remember what to check during the pre-ride inspection :


T = Tires and wheels

C = Controls

L = Lights and electrics

O = Oils and fluids

C = Chassis and chain

K = Kickstand


This method is useful, but I’m going to present a simpler one, because I’ve found that by making the pre-ride inspection too complicated, you encourage riders to ignore the whole thing completely.

I try to check all the items on the T-CLOCK list fairly regularly, but to be honest, I don’t check them all every time I ride. A lot depends on the bike I’m riding; for example, if I know that a bike doesn’t use oil, I might only check the oil once a week. If the bike is an oil burner, I might check it in the morning, then check it a couple more times as the day progresses.

I’ve found that the cables and other controls on modern bikes seem to need less attention than those on older bikes : I might go a couple of weeks without attending to my cables and controls, depending on the conditions I’ve been riding under. As for chains, I prefer shaft-driven bikes, so I can eliminate that messy procedure entirely. I do check for loose bolts in the chassis and make certain the spring is attached to the kickstand each time I ride. The two things I consider absolutely essential to check before each ride are the tires and lights.


Checking the Tires


I check the air pressure in my tires each morning before I start my bike. I keep an air pressure gauge in my jacket pocket, and I check the tires when they are cold (when the air inside them warms up, which it does very quickly while you ride, the pressure reads higher). Not only is riding with the proper air pressure in your tires safer, it makes your tires last longer. Check your owner’s manual to find the proper airpressure level for your motorcycle.

Whenever I check my air pressure, I also look over the tires themselves to check their wear, and also to look for any abnormalities, like bulges, damage to the carcass, and cracking in the sidewalls, as well as to make certain I haven’t picked up a nail or a chunk of glass. I will not ride on a tire I have any questions about.

The best way to avoid a blowout is to keep a close eye on your tires, changing them as soon as they wear down to an unacceptable level, and to make certain they are free of debris, like nails or other objects that could puncture the tire.

At the same time I check the tires, I make certain the bolts holding the axles in place are tight. Probably the one thing worse than having a flat tire would be having a tire fall off completely.


Looking at Lights


Your lighting system is fairly simple to overlook, but it can get you into a lot of trouble. If your brake lights aren’t working, you can end up with a Chevrolet enema before you even get out of town. Bikes stop more quickly than most cars, and car drivers, by and large, don’t give themselves enough room to stop when they’re following you. Brake lights are not much protection to keep tailgaters from embedding themselves into your nether regions, but they are all you have (at least until someone designs an anti-tailgating device that uses a 70mm cannon mounted on your saddlebag).

Motorcycle headlights and tail lights seem to fail more frequently than their automotive counterparts, probably because of increased vibration. Since most motorcycles only have one headlight, if it burns out, you will be up the creek when the sun goes down. It’s a good idea to check both the high beam and low beam of your headlight when you check your tail light and brake light.

This might seem like a lot of preparation before you can ride, and it is, but the consequences of being unprepared on a bike are just too great. Learn the controls of your motorcycle. Memorize them and test yourself on them. In an emergency situation, your life can depend on your split-second reactions. You can’t afford to lose any time in reacting because you had to think about where a control was: That microsecond can cost you your life.

And internalize the habit of giving your bike a preride inspection. You might feel tempted to skip it when you’re late for work or trying to get to a movie on time, but the possible consequences of some sort of failure of your motorcycle could be so severe that you might never see a movie or be able to work again. Take a few minutes to check over your machine before you take your life in your hands. Those minutes may add years to your life.

How to Choose Your Best Extreme Riding Gear !

Nothing surpasses the pleasure of seeing the world on a motorcycle, because on a bike, you are right there, in the thick of it. That means you get to smell the freshly cut hay alongside the road you’re riding down. The morning sun recharges you, just as it recharges the flora.


The downside of all this nature worship is that you will experience the world in its entirety, and you must take the bad with the good. That means being prepared for any kind of weather.


Rain Gear


Ride long enough, and your rain suit will become as much of a part of your everyday riding gear as your helmet : You won’t leave home without it. A good rain suit can turn a miserable, wet ride into a tolerable or even fun one.

Rain suits are either one - or two - piece suits, made of polyvinyl chloride (PVC) or nylon. I prefer the one-piece suits, since rain can seep in between the pants and the jacket on a two-piece suit.

When selecting a rain suit, choose as brightly-colored a suit as possible. Visibility is especially important when it comes to gear you will wear in low-visibility situations, like the rain. Do not buy a black rain suit. Face it, you’re not going to look cool while riding a motorcycle in the rain, regardless of how tough your rain suit looks. Since being cool is out of the question, you might as well be safe.

PVC provides better rain protection than most nylon suits, but because it is so sticky to the touch, it can be difficult to get on and off. To get around this, the best PVC suits have a nylon mesh lining that slides against your leather riding gear. Look for a suit that has such lining in both the upper and lower portions.


In my experience, the best rain gear is a waterproof riding suit, like the Alpinestars Durban Gore-Tex jacket and pants, which are made of Gore-Tex Cordura material. With these, you don’t have to bother putting a rain suit on when foul weather approaches and taking it off when it passes. Even the best rain suits are a hassle to put on by the side of the road on a windy day, and when they get wet, they can be real buggers to get off over leather.

As backward as it may seem, I’ve encountered a lot of resistance to rain gear. This strikes me as so odd. I know from long years of experience that few things in this world are as miserable as spending an entire day in drenched leather.

You can get a bare-bones two-piece rain suit for well under $50. Expect to spend over $100 for a top-quality one-piece suit.


Freezing to Death : Beating the Cold !


Motorcyclists tend to get cold more often than they get hot. Even on a relatively mild day, say 65 degrees Fahrenheit, the windchill on a motorcycle traveling at 65 miles per hour can approach freezing. Hypothermia (a condition where your body temperature drops to dangerously low levels) is a very real danger on a bike. As I said earlier, in cold weather, a synthetic motorcycle suit can be a real lifesaver, but even those who can’t afford such a suit can throw together the proper gear for riding on a cool day.

Thermal underwear is a given if you plan to ride when it’s cool. On a bike without fairing, I wear thermal underwear (tops and bottoms) whenever the temperature dips below 70 degrees Fahrenheit.


On really cold days, I wear jeans and a turtleneck sweater over my thermal underwear. I like to wear a sweatshirt over that, along with either chaps or riding pants. When the temperatures get too cold, the summer leather riding suits usually go into hibernation.

Even if you can’t afford a jacket with electric liner, you can still benefit from electrically-heated clothing on a budget. Ansai, as well as several other companies, makes electrically-heated vests you can wear under your jacket. These vests can keep you toasty on even the coldest ride. On super-cold days, I’ve worn an electric vest under my rain gear, even though it wasn’t raining. The vest warmed up the entire inside of the suit and kept me as warm as if I’d been driving a car.


Keeping your hands warm can go a long way toward keeping your whole body warm. Most of modern companies offer electrically heated handgrip kits, and also offers them as an option on its bikes. You can also purchase something called Hand Mitts (Click on the picture above), sheaths that attach to your handlebars and surround your controls. These devices may look odd, but they provide superb protection against the elements.


Baked, Boiled, or Fried : Beating the Heat !


All motorcyclists have to deal with the heat. Riding all day under the hot sun takes a lot out of your body. You can become dangerously dehydrated and even suffer heat stroke. At the very least, you may become tired, and your judgment and riding skills will suffer.

One of my most dangerous riding experiences occurred because of dehydration. I got a mild case of food poisoning in Las Vegas, but didn’t realize it until I was headed across the Arizona desert. At the worst possible moment I could imagine, I realized I couldn’t keep down water. I spent a difficult (and dangerous) day making my way from gas station to gas station, until I finally had the sense to call it quits and get a motel room.

Since that episode I’ve learned a lot about riding in heat. The most important thing to remember is to keep hydrated. Always drink plenty of fluids, and on really hot days, drink fluids especially designed to rehydrate your cells, like sports drinks. Remember that Caffeine is a diuretic, and will deplete your body’s store of water rather than replenish it. If you feel thirsty, you have already gone too long without a drink. If you ride much in hot climates, you should really invest in a Camel Back or some other brand of water reservoir. Fill these with ice, and in addition to providing you with refreshing water to drink, they will keep you cool during the day.

Another method for keeping cool is to soak your shirt under your riding gear. This works especially well with a heavily ventilated jacket, like an Alpinestars TGP Air Jacket. You can control the rate of evaporation of the water on your shirt by opening and closing vents in the jacket.


The right gear is crucial for hot weather riding. Most leather makers now offer perforated leather riding gear, which lets air flow through the garment. There are even a few companies that offer mesh jackets with protective armor, sort of like the gear worn by off-road riders. These help you keep cool but still provide reasonable abrasion protection. Joe Rocket’s Phoenix jacket (Click on picture above) is a very popular jacket of this type.

Again, like I said in How To Choose Your Riding Gear : Jacket, Pants, Gloves & Boots ! , synthetic riding suits make excellent hot-weather riding gear. You can remove the lining from most of these and just use the outer shell, which still retains all the armor and protective qualities. The suits themselves have many zippered vents, allowing you to control airflow. I recommend wearing long pants and a long-sleeved shirt under its suits, since theoretically its Cordura can melt under extremely high temperatures, but in all its years of manufacturing suits (and examining and repairing suits that have been through crashes), they have yet to find one case of this happening.

While I can’t condone this practice, your risks would probably be minimal if you chose to wear just shorts and a T-shirt under your Alpinestars suit on an extremely hot day. You would still have far more abrasion protection than someone riding in jeans and a light jacket.

How to Choose Your Riding Gear : Jacket, Pants, Gloves & Boots !

Although we can do a lot to make motorcycle riding safer, the fact remains that motorcycles tend to fall over more often than cars. Think about your soft skin hitting the hard pavement, and you start to see why we wear special clothing when we ride. The following list describes the bare-minimum amount of protective gear you need to wear when riding :

- Over-the-ankle leather boots
- Leather, full-fingered gloves
- Long pants
- A riding jacket


This list defines the absolute minimal amount of clothing you can wear to ride safely, especially concerning the last two items (pants and jacket). You may have seen people riding in shorts, tennis shoes, and nothing else. My advice is to not become attached to these people, because should they survive even the most minor spill, they will not emerge from the experience as people you’d want to look at on a regular basis.


Denim actually provides a fair amount of abrasion resistance and should be considered the lowest acceptable standard for protective pants and jackets, but many riders prefer the safety (and style) of a purpose-designed riding suit. These suits, usually constructed of leather or special synthetic materials, like Kevlar and Cordura nylon, offer superior abrasion resistance and often have built-in armor to protect vital areas of a rider’s body.

Make certain that your riding gear is constructed of competition-weight leather (leather that is at least 1.3 millimeters thick) : Leave the fashionweight stuff to the supermodels and biker wannabes.


Looking Good in Leather


Competition-weight leather (leather that is at least 1.3 millimeters thick) provides the best crash protection of any material, period. That’s why it’s the material of choice for racing suits. I can guarantee you (from personal experience) that buying a new jacket is much less painful than road rash, which is what riders call the abrasions from a crash.

Not all that long ago, a motorcyclist had one choice when it came to protective gear : the traditional leather biker jacket, like Marlon Brando wore in The Wild One. This lack of choice had its advantages: Back then, you knew who rode a bike and who didn’t.

The variety of styles and colors now available for leather riding gear probably has a lot to do with the increasing popularity of leather in the fashion world. No longer are motorcyclists forced to choose between Marlon Brando’s biker jacket or nothing at all. Today’s jackets and complete riding suits are available in as many styles and colors as are motorcycles themselves. And traditional black leather riding gear is now available in shapes and styles to complement every body type.


Synthetic Riding Suits : Ties Optional


While leather is still the optimum material for crash protection, an increasing number of riders choose synthetic riding suits. The advantages of leather are most apparent at extremely high speeds (which is why racers choose leather), but at speeds under triple-digit velocities, synthetic suits provide all the protection you are likely to need.

These suits have certain advantages over leather. Most of them are machine washable, unlike leather, which must be sent to a cleaner. And many of them are waterproof or water-resistant, eliminating the need for special rain gear. Plus, these synthetic suits can easily be worn over regular clothing, a tremendous advantage for people who use their motorcycles to commute to work.

Most synthetic suits are constructed with removable liners, allowing the rider to use them over a broad range of weather conditions. In hot weather, riders can wear light clothing beneath their suits, and as the temperatures drop, riders can put in the liners and wear extra layers of clothing.


Gloves : How Much Blood Can You Lose Through the Palm of Your Hand ?


Many riders - even those mentioned earlier, who wear nothing but a pair of shorts and some sandals - wear a pair of gloves when they are riding, if for no other reason than for comfort.

Always wear a sturdy pair of leather gloves, preferably a pair with gauntlets that extend over your wrists. A good pair of gloves designed specifically for motorcycle use will have extra leather on the palms, knuckles, and fingers. This provides additional protection against abrasion in case of an accident.

Riders who like to consider themselves tough often wear fingerless gloves. While these will provide some palm protection in the event of a crash, they really offer very little hand protection. Plus, while you are riding, the wind stretches out the finger openings, and bugs can get blown in. Getting stung by a bee on the palm of your hand can make your ride home a painful and dangerous experience. Full-fingered leather gloves prevent this. In fact, bees are one major reason to wear protective gear. They are a major part of the riding experience; sooner or later, you will get stung. Wearing gloves is one of the most effective ways you can avoid bee stings. I especially like gloves with large gauntlets that go well past the sleeve opening on my jacket; this keeps the little buggers from flying up my jacket sleeve and stinging my arm.


Fancy Footwear


Even choosing footwear for riding requires you to think. You need to wear a pair of over-the-ankle leather boots to protect your ankles from being burned by the exhaust pipes and from stones and other debris. You also need to take other factors into account when selecting a pair of boots.

On a motorcycle, your feet are an important part of your motorcycle’s chassis : They are what hold up the motorcycle when you are at rest. In effect, when you aren’t moving, the soles of your shoes are like an extra set of tires. Because of this, you’ll want to wear a pair of boots with grippy soles. While fashionable cowboy boots provide adequate ankle protection, their leather soles are far too slippery for them to be safe riding shoes. If you wear cowboy boots, make certain they are work-style cowboy boots with grippy rubber soles. That holds true for any style of boot you choose.

I prefer a pull-on boot over a lace-up boot, and not just because they take less time to put on. I worry about laces coming loose and getting caught in moving parts. Motorcyclists seem to develop unnatural attachments to their boots, perhaps because they are such an integral part of riding. I have a couple of pairs of riding boots that I’ve elevated to the status of pets.

My favorite boots are a pair of Durango Men's Work boots I’ve had since few years ago. These are the big, up-to-the-knee black leather boots that scare people when you walk into the room wearing them. I’ve ridden through thousands of miles of rain and snow in them, I’ve even crashed in them, and they still have the original pair of soles.

How to Choose Your Riding Gear : Helmets !

Topping your list of essential items should be your helmet. The issue of helmet use causes more debate than any other issue in motorcycling, which is insane : It’s like arguing for or against smallpox vaccinations during the nineteenth century.


Choosing the Right Helmet


Make no mistake about it: Not wearing a helmet is stupid. According to a long-term study conducted by Professor Harry Hurt for the University of Southern California’s Head Protection Research Laboratory, you’re five times more likely to suffer a serious head injury if you have an accident while not wearing a helmet than you are if you crash while wearing one. Every study ever conducted backs up Hurt’s findings.


Given the overwhelming evidence supporting the effectiveness of helmets, you’d think everyone wears one, but you’d be wrong. Stand on any street corner in a state without helmet laws, and you’ll see as many bare heads as you will see helmeted heads. People go to extreme lengths to justify their choice to not wear a helmet, but none of their justifications hold up in the face of all the available research. The arguments that helmets break necks, block vision, impair hearing, and cause overheating have been proven myths by every study ever conducted.

I believe most people who don’t wear helmets make their decision based on peer pressure. Otherwise reasonable, intelligent adults seem more afraid of facing the ridicule of their comrades than they are of living out the rest of their lives as produce. I actually had a man at the annual motorcycle rally in Sturgis tell me he always wore a helmet but wasn’t wearing one during the rally because his friends weren’t wearing theirs. I was a rebel, I told him, and I wore mine anyway.

I was once in his position. I rode for over a decade without a helmet, mainly because when I was young, I hung out with hardcore Harley bikers, and they would have thought I was some kind of wimp had I worn a helmet.

When I was 25, I took a job working as an orderly in a rehabilitation hospital, in the head-and-spine-injury unit. One patient I worked with was a victim of a motorcycle crash. He didn’t break a single bone in his accident, and had he been wearing a helmet, he would have walked away with nothing but his pride injured. But he wasn’t wearing one, and he hit his head on a rock.

While his body was perfectly healthy, the patient couldn’t remember where he was from one minute to the next. One of my jobs was to lead him to the cafeteria every day, because he forgot its location from one meal to the next. That spring, my wife and I both bought motorcycle helmets, and I haven’t ridden without one since.

Besides protecting your head, a good-fitting helmet actually makes riding more comfortable. Helmets reduce road noise, keep the wind blast out of your face, and keep bugs and other debris out of your eyes.


How Helmets Are Made


Helmets help keep the contents of your head on the inside rather than the outside by using four basic components in their construction:

- The outer shell. The outside of a helmet, usually constructed of fiberglass or injection-molded plastic, disperses energy from an impact across a broad area of the helmet before that energy reaches your head.

- The impact-absorbing lining. This area inside the outer shell, usually made of a dense layer of expanded polystyrene, absorbs most of the shock caused by an impact.

- The comfort padding. This innermost layer of soft foam and cloth conforms to your head and is primarily responsible for how comfortable the helmet is.

- The retention system. This consists of the strap connected to the bottom of the helmet that goes under your chin and holds the helmet on.

Helmets come in a variety of styles, from small, bowl-shaped half-helmets that protect your brain stem and not much else, to sleek fully enclosed helmets that protect everything above your neck. In between are the three-quarter, or open-face helmets, which cover most of your head but leave your face unprotected. These give better protection than half helmets, but should your face contact the pavement at speed, an open-face helmet will provide you with a one-way ticket on the ugly train. Neither half helmets nor open-face helmets offer the comfort full-face helmets provide by shielding the wearer from the elements.

Whichever type of helmet you choose, the important thing is to choose a helmet. It is the single most crucial piece of motorcycle gear.


Choosing the Right Helmet


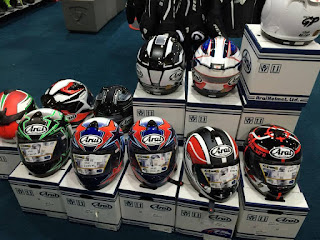
Helmets come in a variety of styles and prices. You can get a full-face helmet for under $100, while high-end helmets can run over $500, or even more than you thought for brand new "hi-tech" helmet.

Why do some helmets cost more than others ? There are a variety of reasons. Paint schemes add to the price of a helmet; expect to pay more for a helmet with fancy graphics than for a solid-color helmet. (If the paint scheme replicates the helmet of a top racer, expect to pay more yet.) Some expensive helmets are more comfortable than cheaper helmets, while others are not.

Some helmets cost more because they use more expensive material in their outer shells. This may contribute to comfort by making the helmet lighter, but it doesn’t make the helmet any safer.


Safety First


All helmets have to meet minimum safety standards set by the Department of Transportation (DOT). Two other organizations, the American National Standards Institute (ANSI) and the Snell Memorial Foundation, also certify helmets. A Snell certification is something I look for on a helmet. Snell won’t certify a half or open-face helmet, as DOT will, and it also has more exacting standards for the retention system than DOT.

If you choose a half helmet, be certain you are getting one approved by DOT. Lately, unscrupulous dealers have been placing DOT stickers (stickers applied to the helmet listing the helmet as DOT approved) on unsafe novelty helmets. Genuine DOT-approved helmets also have a label permanently attached to the inside of the helmet displaying DOT information, like the date of manufacture. Make sure you’re getting the real thing.


Getting a Good Fit


When you get used to wearing a helmet, you will not feel comfortable riding without one. Of course, that assumes that you’ve picked a helmet that fits you well. A helmet that is too loose might flop around while you’re riding, obstructing your vision, and a helmet that is too tight will live up to the worst predictions of the anti-helmet crowd.

If all heads were the same shape, choosing a helmet would be simple: You’d just match your helmet size to your hat size. Unfortunately, helmets have to conform to your entire head rather than just a ring around your forehead.


Because of the difficulty involved in selecting a properly fitting helmet, I strongly advise you to purchase your first one from a store where you can try on different models and sizes. While you can often save money by purchasing accessories through online shop, you won’t be saving any money if you can’t wear the helmet you order from a online shop ads because it doesn’t fit.


A helmet should feel fairly snug on your head to prevent it from sliding around and possibly obscuring your vision or falling off in an accident. It may feel too tight when you first put it on. When in place, a properly fitting helmet should not slide around on your head. At the same time, you need to watch for pressure points - places where the helmet pushes uncomfortably against your head.

When you try on a helmet, wear it around the store for a bit, and when you take it off, note any soreness or red spots. Wearing a helmet that exerts pressure on your head can turn into a brutal form of torture after an extended period; improperly fitted helmets have permanently turned many riders against helmet use. If the helmet you are trying on touches pressure points, try on a larger size or a different brand or model.

Why Customizing Your Bike ?

Originally, people modified their motorcycles to improve them in some way. In the early years of the sport, for example, many motorcyclists added a windshield, some saddlebags, or perhaps a sidecar to their bikes.

After World War II, customization in the United States focused on improving performance. Young American men and women had been exposed to lightweight, high-performance European motorcycles during the war. When they came home, the old U.S. bikes just didn’t cut it. Most motorcycle riders had to figure out alternative methods to get higher performance out of their bikes.


Choppers - Custom Motorcycle


How’d they do it ? They simply lightened their bikes. They unbolted every non-essential part they could unbolt or torch. This became the pattern for customization in this country, and to this day, the bobbers, as the original chopped customs were called, still set the pattern for U.S.-style custom bikes.


As the performance levels of stock motorcycles climbed, it became less necessary to customize a bike to attain more speed. But people now customize for other reasons, too.

Some people customize for style. Modifications like lowering a bike’s suspension, altering its steering geometry, and adding ape-hanger (tall) handlebars - the modifications that have come to define the term custom for many people-actually detract from a bike’s performance, but scores of people do these things to their bikes anyway. (Many of the radically customized motorcycles you see in bike shows are actually unrideable.

But there’s an alternate movement in the realm of motorcycle customization. Many people still modify their bikes to increase their usefulness. People add aftermarket suspension components to improve a bike’s handling. They mount windshields, more comfortable seats, and hard luggage to make a motorcycle a better long-distance tourer. They add aftermarket air filters and rejet their carburetors, not only to make their bikes faster, but to make them more efficient. In a way, customization has come full circle.


Comparing Customs


Ask a typical American to describe a custom bike, and he or she will most likely describe the radical chopper-type bike. Such bikes account for the largest segment of customization in the United States, but elsewhere in the world, other types of customs have been more prevalent. In the past few years, some of the other styles of customs have been gaining in popularity in the United States, especially the café racers and streetfighters that have long been popular in Europe.


Choppers


Choppers define American motorcycle style. The original bobbers were American hot rods, stripped-down Harleys, and Indians built for speed. As other, faster motorcycles became available, custom Harleys evolved from the bobbers of the 1940s into the choppers of the 1960s. By then, chopper style had become carved in stone: extended forks; high handlebars; a low, fat tire on the back; a tall, skinny tire up front; and a tall backrest or sissy bar.

In the 1970s and 1980s, choppers evolved into low riders, becoming longer and lower. Now lowrider–type customs are more common than traditional choppers, although the original chopper-type customs have been making a comeback in the past few years.

" I don’t recommend building a chopper-type custom. Such bikes tend to be so foul-handling, they are unsafe on the road. Riding a motorcycle is challenging enough on a bike you can steer. If you want to own such a machine, I recommend buying one from an established customizer who knows what he or she is doing when building the bike. "

The original bobbers were either Harleys or Indians. When the British began exporting large numbers of bikes to the United States in the 1950s, these, too, became popular bikes to chop. Initially, customizers also chopped Japanese bikes, but by the early 1980s, Harleys once again ruled the custom-bike market in the United States. But due to the difficulty of obtaining new Harleys, along with their soaring prices, Japanese bikes have begun to regain popularity in the custom scene. You can now buy aftermarket customizing parts for a variety of Japanese cruisers.


Café Racers


While Americans were busy chopping their Harleys, the Europeans took a different approach to customization. For many post-war Europeans, motorcycles were the only form of transportation to which they had access. In Europe, motorcycles were (and still are) used more frequently as practical transportation than they are in the United States.

Thus, customization tended to be more heavily focused on practical improvements. That, combined with the more liberal attitude toward driving fast in many European countries, meant that Europeans were more interested in building faster, better-handling customs than they were in adding higher apehanger handlebars and taller sissy bars.

In the 1950s and early 1960s, a discernible European style of custom began to emerge. These bikes were inspired by European racing motorcycles. Owners moved their footpegs toward the rear and lowered their handlebars, often using handlebars that clipped directly on the fork legs (clip-on handlebars). This placed the rider in a crouched, forward-leaning position. Some owners adapted small fairings to their bikes to mimic the fairings used by racers.

These bikes became known as café racers, supposedly because their owners hung out in cafés and raced each other from café to café. Such bikes have always had a cult following in the United States, a following that continues to grow over time. There are probably more café racers in the United States right now than at any time in history. In some cities, like Minneapolis and San Francisco, the popularity of café racers rivals that of custom Harleys.


" Café racers are motorcycles modified to resemble racing motorcycles from the 1950s and ’60s. They are called “café racers” because their owners supposedly raced from café to café in London, where the bikes first appeared in the 1960s. Converting a stock motorcycle into a café racer is known as doing a café chop on a bike. "


Although when taken to the extreme, café racers can be as uncomfortable to ride as choppers, when modified correctly, café racers handle much better than choppers. Another benefit of building a café racer instead of building a chopper is that it’s much cheaper. To build a respectable chopper, you’ll either need to start with a Harley-Davidson or with one of the big Japanese cruisers—an expensive proposition, either way.

You can do a very nice café chop on just about any older Japanese motorcycle—bikes you can pick up for less money than you’d spend on tax and a license for a big new cruiser.


Streetfighters


While Yankees progressed from choppers to low riders, in Europe, café bikes evolved into streetfighters: stripped-down, hopped-up road warriors of the type the original post-war customizers in this country might have devised if they had had access to modern technology.

Streetfighters are all function. They have no bodywork, no fancy paint, and no chrome. They owe their very existence to practicality. As sportbikes became more and more complex, they also became more expensive to buy and more expensive to repair after minor crashes. Insurance companies began writing off perfectly functional sportbikes rather than replacing expensive plastic pieces.


" Streetfighters, or hooligan bikes as they are sometimes called in the United States, are bare-bones sportbikes, stripped of all extraneous body work. "


European motorcyclists, with war-bred practicality, started rescuing those damaged bikes, but instead of replacing expensive body parts, they just trashed all the plastic. Like American customizers in the 1940s, they chopped off all the extraneous parts, replacing only what was needed, like the headlight. In fact, they often bolted on a couple of headlights. When the whole thing was ready, they applied a coat of flatblack paint (to protect the surfaces of the exposed metal, not for any cosmetic reasons), then went out and rode the wheels off these streetfighters.

These bikes proved to be so popular that the manufacturers got in the act. A variety of companies began marketing sporting bikes without any bodywork, but no one got the streetfighter look down as well as Kawasaki. The latest Z1000 embodies the streetfighter look.


So You Want to Customize Your Bike ?


If you are interested in customizing your bike, you need to ask yourself a few questions:

1. What do I want from my bike? Do I want to improve some functional aspect, like comfort or handling? Do I want to improve my bike’s performance? Do I just want to change my bike’s appearance? What you want from your bike will guide you when deciding what changes to make.

2. What compromises am I willing to make to get what I want? A motorcycle represents a series of compromises made by the designers and engineers who created it. They made those compromises for a reason. Altering one aspect of your bike can cause unintended consequences in some other aspect. Honestly assess what you are willing to sacrifice before making any changes.

3. How much am I willing to spend? There are many small, inexpensive alterations you can make to your bike that will improve its comfort, handling, appearance, and performance. But making major alterations usually costs a lot, and there’s no guarantee you’ll achieve your desired results. Before embarking on a major modification of your motorcycle, make certain that you know what you want, that your intended modification will achieve that goal, and that the results will be worth what they’ll cost you.

Only after you’ve answered these questions should you make any major modifications to your bike.

Get Fitted Up Your Motorcycle !

Forget any idea of "one size fits all". Your bike has to fit you just right if you want to have precision control. To change down smoothly under braking, your front brake and clutch levers must be positioned right. For smooth starts and slick changes the clutch bite point needs to be set right. A badly set gear-shifter can make you wobble and your changes slow up or down the box. Little things do matter. Even two people the same size may need to set a bike differently to fit differences in arm, leg and trunk lengths as well as riding style and personal preference.

Fitted Up Your Motorcycle


Adjusting the controls "spot on" gives you optimum control with maximum comfort. Each control action does its own job without disturbing balance or weight distribution, in an emergency that can be the difference between staying in control and coming off.

So let’s look at how to do it.


Set that Front Brake


- We want instant braking

- Good "feel"

- Easy throttle blipping for smooth down changes


OK, in your normal ‘at speed’ body posture, reach out for the brake. It needs to be angled so that it "falls to hand". Try it eyes closed. If the lever is too high your wrist will bend up uncomfortably and it will be even worse as you lean back into your braking posture. If the lever is too low, it might feel OK in your sit up braking posture but it won’t fall naturally to hand at speed.

Once you have found the small range of rotation of the lever that feels right for just braking, work on braking and blipping the throttle at the same time. Most times you do this, you will be in sit up posture under firm braking, slowing for a curve, but just occasionally you will want to brake and downshift while maintaining your ‘at speed’ posture. (I find this happens when aborting a passing maneuver and getting ready for the next chance).

Riding with 2 fingers covering the brake is a recommended technique – but it may require a different setting.

Perfect blipping is most critical when under heavy braking because that’s when rear tire is lightly loaded you are most likely to break traction with a bad downshift, so bias your final setting to favor this situation.


Set the Clutch


Easier than setting the brake lever because your left hand only has one job. For me precision clutch control is most demanding when maneuvering at walking pace, so I want the angle set for that.

The other thing to adjust is the clutch biting point. Two things are important here: low speed maneuvering and quick downshifts at speed. To get quick shifts, I want the clutch disengaged with only a part squeeze on the lever, not have to pull it up to the grip. For maneuvering and stopstart city traffic, you want the ‘just engaging’ point of the travel at the most comfortable and controllable amount of squeeze. Bikes with a heavy clutch or a long, draggy action can be a pain! One thing is for sure, you’ll always ride better with your best compromise setting than the way it came. And if it is still a pain, maybe you should see if there are any upgrades or modifications available for your model.


Set the Rear Brake


If you thought adjusting hand controls was fiddly, you ain’t seen nothing yet!

The rear brake is the third control that needs ‘feel’ and feedback to the rider. Motorcycles vary in the pedal pressure and travel that’s needed. You only need enough pressure to squeal, not lock(!), the rear tire at 70mph. The brake may be capable of more than this but you won’t ever be able to use it, even with a failed front brake. If you have the confidence and control to rear tire squeal from 70mph down to 20mph, I congratulate you. You truly are a rear brake maestro. If not, please don’t start practising at 70 mph unless you are feeling suicidal!

Unless you are a maestro already, set your brake for maximum comfort and control when using it fairly gently for low speed work and slippery conditions.

The correct way to make adjustments may not be obvious, check out the manufacturer’s instructions in the manual. Make adjustments a little at a time. Remember that a pedal set too low could reduce ground clearance and the available lean angle. Look what other settings (peg position for example) are available on your model.


Set the Gear Shift


There is probably more variation in travel, weight, feel, crispness and adjustment in gearshifts than in any other motorcycle control. Just be glad you are not forced to use hand gear selection that was popular in the old days. Read the manual to see how to make adjustments. Aim to be able to make quick, clean shifts both up and down without repositioning your foot or straining your ankle. Be aware of possible ground clearance issues.

When you reckon you have got the right setting just do a quick check to make sure selecting first at standstill with your other foot down still feels OK. This move is different because you are unbalanced and out of the normal body position. Sports bikes can be a bit awkward and tiring to ride in the city unless you get it right.

I hope you have got your bike set up to suit you now. I promise it will make a major improvement to your comfort and control. As you get familiar with the new feel, give yourself a little time to settle in, but don’t be afraid to make further minor adjustments that get the total package working in harmony.

Setting the bike for precision control is groundwork advanced riding.
motorcycle modification Proudly Powered by Blogger